

Inkmachines nr. 138 - Guide Pin (4 buc)
Ink MachinesSpecifications
- Brand
- InkMachines
- Packaging
- 4 pcs
- Quantity
- 4 pcs
- Material
- Steel
- Compatibility
- Scorpion X2
- Usage
- Spare part
Useful guides:Piese de schimb Ink Machines — Dragonfly, Stingray, Scorpion, Cobra: ghidInkMachines — mașini suedeze și piese de schimb (Dragonfly, Scorpion, Stingray, Cobra)Întreținerea mașinii de tatuat: piesele de schimb esențiale
Guide & full description
Complete guide: Inkmachines nr. 138 - Guide Pin (4 buc)
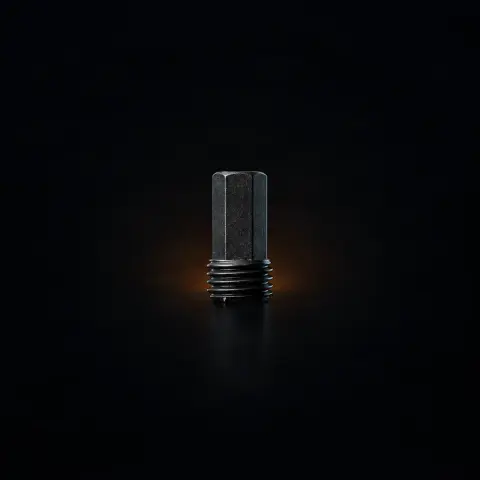
We're talking about a set of 4 original InkMachines guide pins (spare part no. 138), a precision mechanical component for the InkMachines Scorpion X2 tattoo machine. Their role is to correctly align the moving parts in the actuation mechanism, so that the needle movement stays on the desired trajectory, without lateral deviations. It is a part intended for artists and technicians who maintain their own equipment and want to preserve the machine's precision over time.
How to use
- First confirm compatibility: part no. 138 is designed for the Scorpion X2 machine. Check it against your machine's InkMachines parts diagram before disassembling anything.
- Prepare a clean, well-lit workspace with a tray or a light-colored surface so you don't lose the small pins. Keep the appropriate tools and the parts diagram handy.
- Partially disassemble the Scorpion X2 machine to access the guide area, following the order in the manufacturer's diagram.
- Remove the 4 old pins, noting the position and orientation of each, so you can install the new pins identically.
- Insert the 4 new pins into the dedicated slots, respecting the correct orientation indicated in the diagram.
- Optionally, apply a thin film of tattoo machine-specific oil to reduce friction.
- Reassemble the machine and test it empty (dry run): the movement should be smooth, with no visible lateral play and no metallic noise.
- Replace all 4 pins simultaneously, even if only one appears worn, so that the alignment remains even.
Tips from us
- Do not mix old pins with new pins: worn parts have slightly altered dimensions, and the mixture can create uneven alignment. Replace the entire set of 4 at once.
- Keep the old pins as a reference until you confirm that the machine works correctly with the new ones.
- Periodically inspect the guide system — for those who work daily, a check every 6-12 months is a reasonable routine.
- You can recognize wear by: increased play in the mechanism, metallic noise during operation, visible lateral movement of components, or a matte/marked surface on the pins.
- Work over a tray and consult the InkMachines parts diagram for the exact positioning of each pin — they are small components, easy to install incorrectly.
Frequently asked questions
Are the no. 138 pins compatible with other InkMachines models?▾
No. Guide pins no. 138 are specifically designed for the Scorpion X2 machine. Each InkMachines model uses components with its own dimensions, so if you have a different model, check the appropriate part number in the parts diagram before ordering. Installing a part from another model can lead to malfunction.
Can I replace just one pin or do I need all 4?▾
Theoretically you can replace just one, but the recommendation is to replace all 4 pins simultaneously. Worn pins have slightly different dimensions than new ones, and mixing can create uneven alignment and asymmetric wear. That's why the set comes with 4 pieces — it covers a complete overhaul of the guide system.
How do I know if the guide pins have worn out?▾
Typical signs are: increased play in the movement mechanism, metallic noise during operation, visible lateral movement of the guided components, or wear marks on the pin surface (matte surface, grooves, diameter reduction in the contact area). If you notice any of these, it's time for replacement.
How often should they be inspected, and do they need lubrication?▾
The frequency depends on usage intensity; for artists who work daily, a check every 6-12 months is a good benchmark. The pins can benefit from light lubrication with tattoo machine-specific oil, which reduces friction. Preventive maintenance and regular inspection are more effective than waiting for failure.
How do I correctly install the pins?▾
Installation involves partial disassembly of the Scorpion X2 machine to access the guide area. The pins are inserted into the dedicated slots with the correct orientation. Use the appropriate tools and consult the InkMachines parts diagram for the exact positioning of each pin, then check operation before using the machine.
What happens if I install them incorrectly?▾
Incorrect installation can lead to misalignment of the mechanism, imprecise needle movements, accelerated wear of other components, and in severe cases, damage to the machine. That is why it is important to follow the orientation in the diagram and test the machine dry after installation, before any session.
Product description
You might also like

Reviews
No reviews yet. Bought this product? Be the first to leave one.